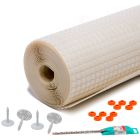
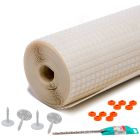
PermaSEAL 3 Damp Proof Membrane Kit 10m²
A high-quality damp proof membrane kit that contains all you need to protect internal walls against damp & the reappearance of salts. It is specifically designed for application on to damp walls to isolate them from new finishes.
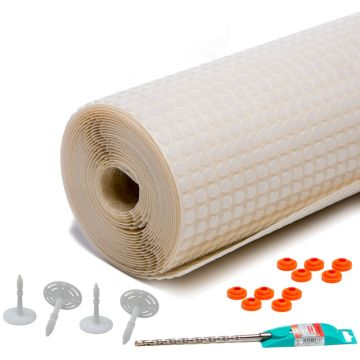
Damp Proof Membrane Kit - 10m²
Our damp proof membrane kit contains all you need to damp proof walls internally above ground. Once the underlying damp issue is resolved, the high quality 3mm mesh membrane creates a physical barrier to prevent further damage and salt contamination.
The PermaSEAL 3 plaster membrane included in the kit provides an excellent key for a range of finishes. It can be rendered or dot and dabbed immediately after installation. This significantly cuts down the time of the remedial work.
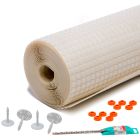
The Damp Proofing Membrane Kit includes:
- 1 x Roll of PermaSEAL 1m x 10m 3mm Meshed Membrane (10m²)
- 1 x PermaSEAL Plaster Plugs 60mm (200)
- 1 x PermaSEAL Sealing washers (200)
- 1 x 8mm x 160mm Masonry Drill bit
Membrane Kits for Damp Walls
The PermaSEAL 3 mesh membrane kit is ideal for damp walls. It is specifically designed to be applied to damp walls to isolate them from new finishes. The membrane kit’s PermaSEAL 3 mesh membrane is impervious to moisture and moisture vapour. This means they create a barrier between the old surface and your new finish. This effectively isolates damp walls and prevents any new salt deposits on the surface plaster and damage to decoration.
Salt Contaminated Walls and Damp Proofing
PermaSEAL 3 Mesh membrane is the ideal product for isolating salt contaminated surfaces. These surfaces can often appear damp in periods of high humidity. The hygroscopic salts that are contained in the surface attract the damp in the air to the surface giving the appearance of a darker, damp patch. This is often misdiagnosed as penetrating or rising damp. The membrane simply isolates the background contaminated substrate from the new finish alleviating any signs of damp.
Damp Proof Membrane Installation
The mesh membrane installation is straightforward. Once the underlying damp issue has been resolved or a new injection damp proof course has been installed, you can simply apply the mesh membrane to the wall. Follow these steps:
- Clean the substrate to obtain as flat a surface as possible. Remove any damaged, loose or crumbling plaster.
- Cut the membrane to size with a sharp knife or scissors.
- Fix the 3mm membrane (with the mesh facing outward) to the surface with plugs. It can be fitted horizontally or vertically.
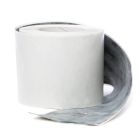
Jointing - The 3mm mesh membrane can be easily bent around corners as it is a very flexible material. Alternatively, it can be butt jointed and sealed with PermaSEAL Fleece Overstrip.
Finishing - Plasterboard panels can be fixed to the membrane by the dot and dab method (minimum of 50% board coverage with the dab adhesive), giving a dry surface ready for immediate decoration.
For more information on all aspects of installation including jointing and finishing, which plaster to apply and how to avoid bridging view the Download tab.
Damp Proofing Internal Walls Video:
Watch this video to see just how easy it is to install a damp proof membrane to protect your internal walls from damp:
PermaSEAL - Complete Solutions. Made Possible.
Our PermaSEAL 3 membrane kits provide a solution to your internal damp proofing needs. If you have any questions around installing mesh membranes or damp proofing in general, our experts are on hand to provide free advice - simply call us on 0117 982 3282.
Read our Causes of Damp Guide and our How to Complete Internal Damp Proofing for more on damp proof membranes and resolving issues with damp.
Features
- Membrane kit that contains all you need
- High quality mesh damp proofing membrane
- Ideal for internal damp proofing
- Ideal when space is a premium
- Provides an excellent key
- Life expectancy of 50 years
- Highly resistant to salts
