
How to Install Epoxy Flooring
It is easy to understand why epoxy flooring is such a popular choice as a floor coating. Hard-wearing and durable, it can cope with even the most demanding situations. On top of this, it is attractive, easy to install and cost effective.
Epoxy resin floor coatings have been widely used in commercial settings for many years. In recent years, it has become an increasingly popular option in garages and other residential situations. The high gloss and professional finish that can be achieved with PermaCOAT epoxy floor coatings transforms a space while delivering a wide range of practical benefits.
Unlike other flooring types, you only have one shot at getting the installation right. This guide provides an overview of epoxy flooring applications, both commercial and residential, and takes you through the application process in more detail.
If you are looking for detailed epoxy flooring installation guidelines, then click below to go straight there:
What is epoxy flooring?
Epoxy flooring is made up of two main components – resins and hardeners. When these two components are combined, a chemical reaction takes place to form a rigid epoxy material. This epoxy material bonds with the substrate. When it cures, it provides a strong, hard-wearing coating that protects concrete from both mechanical and chemical stress. The concrete is no longer porous, making it easy to clean.
Epoxy flooring pictures
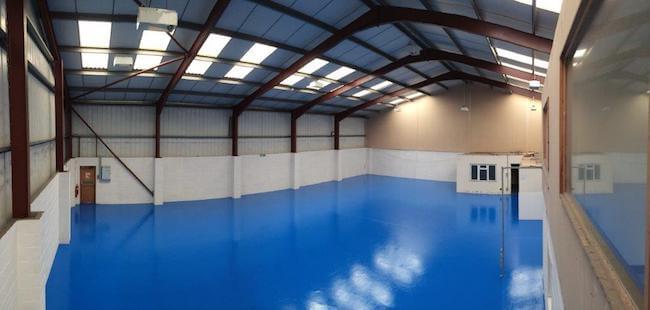
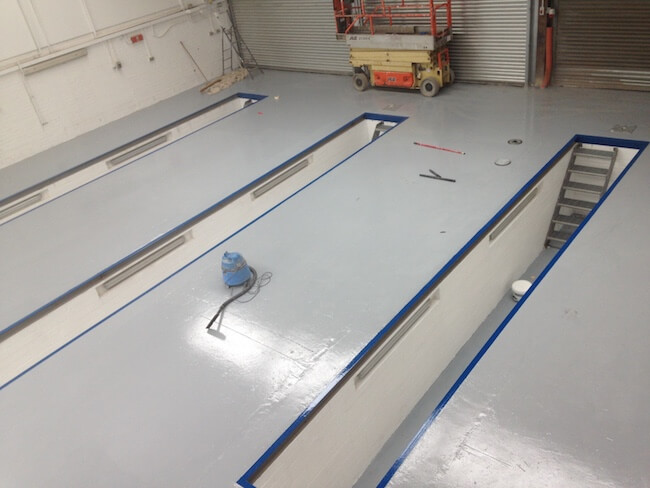
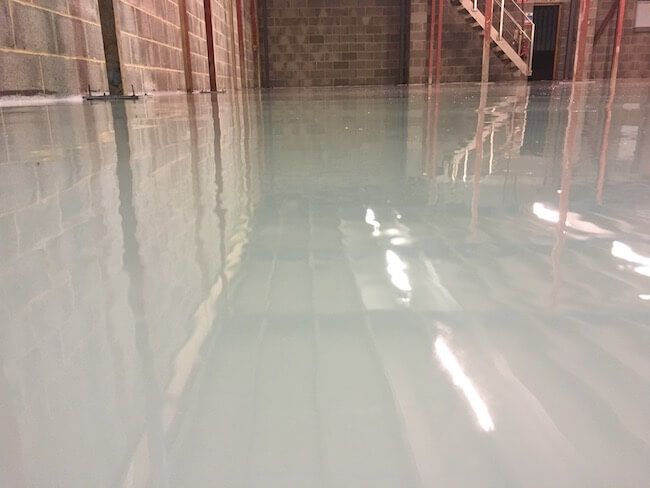
So, what do epoxy floors look like? Many people want to see the finishes that are achievable with epoxy, so we have included several epoxy flooring pictures below. These have not been photoshopped or generated with AI, so they should give you an idea of what epoxy actually looks like:
Benefits of epoxy flooring
Epoxy floors provide a sealed, continuous and hygienic floor surface when cured and deliver a range of benefits, including:
- Hard-wearing and durable – resistant to wear even in high traffic areas and industrial environments
- Non-dusting – can be applied over concrete floors to prevent issues with concrete dust in unsealed floors
- Damp Proof Membranes – epoxy DPMs are ideal for installation where a DPM has never been installed or has broken down over time
- Provides a smooth and even surface (not self-levelling)
- Easy to clean – low-maintenance floor option
- Affordable – a cost-effective flooring option. Click to find out more about the costs of epoxy flooring
- Highly resistant to chemicals – chemically resistant even to potent chemicals
- Heat and water-resistant
- Safe – anti-slip properties & resistant to extreme impact
Applications for Epoxy Resin Floor Coating
Epoxy resin flooring can be used for both commercial and residential purposes. You may need higher-grade flooring in some industrial settings, and epoxy flooring may not be suitable in all domestic settings.
Commercial Uses
For commercial use, epoxy flooring is often a preferred choice because of its unique qualities and the speed of installation. It can be applied quickly, and with a short curing time, meaning that downtime is dramatically limited. This is essential for most modern commercial enterprises. You can also get an anti-slip additive to protect staff.
Epoxy is also a cost-effective option, providing long-term protection for existing concrete, as well as extending the life of new concrete. Its versatility means it can be applied to concrete, cement screed and cement render. It also has several highly desirable and necessary qualities.
In commercial environments, you need an industrial-grade epoxy such as PermaCOAT PRO High Build Epoxy Floor Coating. This is a high build epoxy resin coating for application as a heavy-duty coating at a thickness from 200 to 500 microns.
The high gloss finish is extremely hard-wearing and has good general chemical resistance. When applied to a surface, this gives a dry coat thickness of nearly four times the thickness of a standard epoxy coating. This more substantial coating creates a tough, resilient, corrosion- and abrasion-resistant finish suitable for many industrial and commercial applications, particularly when using a high build system. However, it is not suitable for UV-exposed areas or commercial freezers.
It is more popular than ever in the following scenarios:
- Warehouses & industrial units - epoxy flooring is most important in heavy traffic areas and fast-paced environments. Its durability and chemical resistance make it ideal for industrial environments, where withstanding heavy traffic and machinery is essential.
- Gyms - being slip-resistant, easy to clean and economical makes epoxy flooring a popular choice for gyms.
- Offices - the durability and bold aesthetics of epoxy are ideal for office spaces.
- Residential use - epoxy flooring inside homes is an option. However, it requires a high-specification finish and should be installed by specialists who can advise on suitable finishes and ensure a high-quality, defect-free result.
- Garages - epoxy is a good and very popular option for garages, both commercially and residentially. Epoxy is resistant to oil, petrol, transmission fluid, cleansers and other chemicals often found in garages. You can read our full guide to applying an epoxy garage floor.
- Kitchens - epoxy is widely used in commercial kitchens as it can cope with high temperatures, oil spills and has anti-slip properties.
- Basements - epoxy flooring can act as a liquid damp proof membrane, so would protect items stored on a basement floor from the effects of a damp concrete slab. However, they should not be used where active water ingress is present, nor in an environment where a waterproofing system should be used.
If you have a wet basement and require a waterproofing system, seek our free technical help.
How to apply epoxy flooring
Applying epoxy flooring is relatively straightforward, and anyone with solid DIY skills should be able to apply it. However, to achieve a seamless high specification finish, you should use a professional.
Epoxy Resin is not a self-levelling product, and you cannot simply apply it in larger quantities. You should always level the floor first, and then apply the coating to get the best finish.
Tools needed to install epoxy flooring
Installing epoxy requires careful preparation - and using the right tools will make the application process much easier. Here’s what you need:
For preparing the concrete:
- Mechanical scabbler - to clean and roughen the concrete, ready for the epoxy.
- Grit blaster - to clean and prepare the concrete surface.
For mixing the epoxy base and hardener:
- An electric, high-speed drill - used along with a mixing paddle to mix the epoxy components together.
- Mixing paddle - as mentioned above
- Large roller tray - to hold the mixed product. You can also pour directly onto the concrete if you prefer.
For applying the epoxy:
- Pile roller, ideally long or extended - for cross rolling the epoxy across the surface. You’ll use this for the bulk of the application.
- Paintbrush - to carefully apply the epoxy along the edges of the room.
-
Preparation
You need to begin by removing everything from the room. Once you can access the entire floor, you should sweep and vacuum the area to ensure it is free from dust and debris.
If you come across any cracks, chips or other damage to the concrete, you will need to repair these. PermaCOAT’s high strength epoxy repair mortar is ideal. It is extremely durable and creates a very strong bond to concrete substrates without shrinkage.
First ensure that the concrete slab is free from any grease, oil or solvents before applying the epoxy. All of these have the potential to reduce the bond with the substrate, and so need to be removed completely. You should use mechanical surface scabbling as well as grit blast to prepare the concrete slab for epoxy. Remember, preparation is key to a good epoxy floor.
Using a Primer
Prepping for an epoxy floor can be time-consuming, but it is vital to have a clean concrete slab before applying the flooring.
We recommend using a suitable epoxy primer if the concrete slab may be contaminated in any way. The primer is applied before the epoxy floor coating and helps ensure the main floor coating bonds well. On a clean floor, you also have the option to use grey PermaCOAT Epoxy Floor Coating as a primer. As this is a thinner product, it better penetrates the concrete. You can then use the PermaCOAT PRO High Build Epoxy Floor Coating to add the hard-wearing and high gloss finish.
How many epoxy floor coating layers do I need?
A minimum of two coats of PermaCOAT Epoxy Flooring is recommended for the best coverage and results. You should also use a suitable primer if the surface is contaminated.
If your concrete is entirely free from oil and any other contaminants, you can use one coat of the standard epoxy and one coat of PermaCOAT High Build.
- Epoxy Floor Coating – 50 microns
- Epoxy HB - 200 to 500 microns
You will need to wait for 24 to 36 hours before applying the HB. You can then repeat coats of the HB to build up thickness and service life. The more coats you apply at this stage, the longer the floor will last.
Important note: epoxy floor coatings are not self-levelling. As epoxy is not a self-levelling material, you will need to apply a self-levelling compound before the epoxy application. If this is before an Epoxy Damp Proof Membrane, it must be waterproof.
-
Mixing
Open the base and hardener components. Mix both components independently before combining them in the larger container. For some products, the container will not be large enough, so we suggest having a clean bucket to hand.
Thoroughly mix the two components together using a mixing paddle attached to an electric high-speed drill. Do this for a minimum of two minutes, until the mixture is streak-free and all one colour.
You should not leave the coating in the container, but instead, transfer it to a large tray ready for rolling. Some people prefer to pour the coating directly onto the slab and roll from there.
Important Note: you have a bucket life of approximately 30 minutes. This means that you need to start rolling the coating straight away.
-
Applying the Coating
When applying the epoxy floor coating, you will want to read the manufacturer’s instructions and follow them closely. The following is based on PermaCOAT epoxy floor coating.
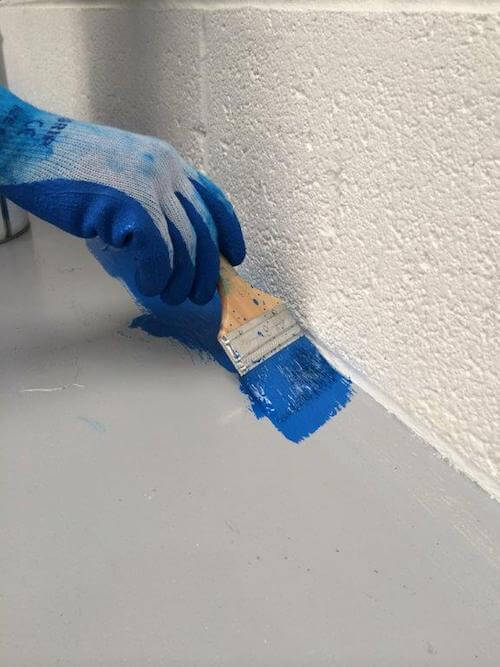
In small areas, like a garage, for example, one person can apply the epoxy to the perimeter, keeping an eye on the working pot life, then roll the internal area:
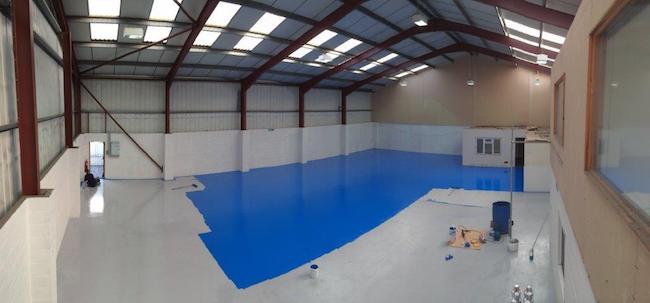
In larger areas, it is advisable to have two or more applicators. This means one person can brush-apply the coating to the perimeter of the room whilst the other starts from a set point and rolls out from there.
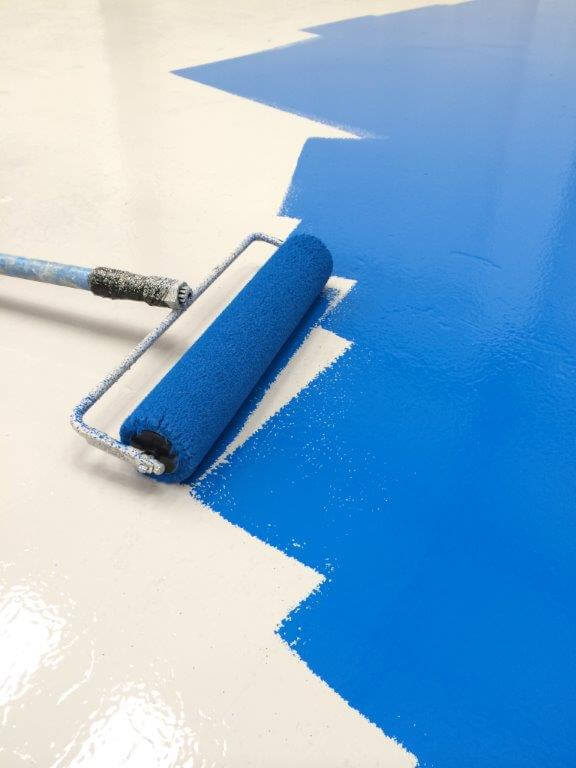
You should apply the epoxy immediately to the concrete slab using a short/medium pile roller.
Cross-Rolling
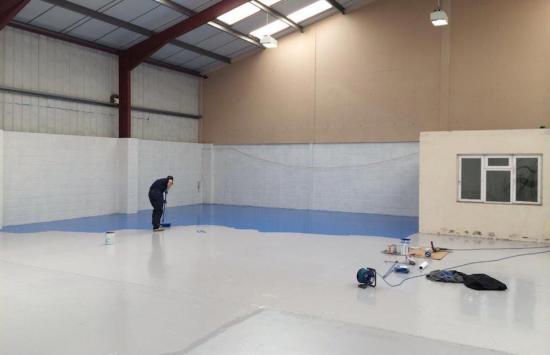
It is highly recommended to cross-roll when applying epoxy flooring. You should do this section by section. This method involves rolling the coating front to back (vertical) and then left to right (horizontal) without reapplying the coating to the roller. This should help ensure an even coat and prevent air from entering the coating, avoiding bubbles. Using an extended roller will help make the job easier.
Note: once mixed, you only have 30–45 mins, depending on the product, to apply it to the surface. This means that any epoxy coating you don’t use will be unusable and, therefore, a waste. It cannot be used for the next coat. Do not over apply or apply in single thick coats, as this may crack or lead to uncured product.
-
Clean Tools
Make sure to regularly clean your tools with hot soapy water and discard any roller heads and brushes.
-
Apply a Second Coat
Allow at least 12 hours to dry between coats - no more than 48 hours. Although the floor will be touch-dry after a few hours, it will take a few days for the epoxy to cure properly.
It is vital to provide as much ventilation as possible to the area to help the epoxy dry. Applying an epoxy floor coating in cold, damp, non-ventilated environments can delay drying for long periods of time. Also, observe application temperatures on the side of the container and do not use outside of these conditions.
How to clean epoxy floors
Although epoxy floors are low maintenance, they should still be cleaned regularly to help extend their lifespan and avoid issues with scratches, punctures and chipping.
We’ve created a complete guide to epoxy floor maintenance here. But, to summarise, we recommend using a synthetic hard-foam mop on the epoxy floor with hot water and a non-acidic cleaner. You can then rinse with hot water to remove residue and dry with a squeegee. This helps keep your floors looking their best.
Cost of applying epoxy flooring
Most people want to know how much epoxy flooring costs, especially when compared to alternatives. The below costs include both product and labour - although confident DIYers can often apply epoxy themselves.
At Permagard, our PermaCOAT range is made up of superior epoxy products designed with longevity in mind. Our standard grey epoxy floor coating is priced at £58.50 ex VAT. Our PermaCOAT PRO High Build Epoxy Floor Coating is £70.00 ex VAT for 5 kg.
The coverage rate for the standard epoxy is 0.2 kg/m² (≈ 25 m² per 5 kg). The HB epoxy covers at 0.25 kg/m² (≈ 20 m² per 5 kg).
Therefore:
- One coat of standard epoxy = £58.50 per 25 m² (≈ £2.34/m²)
- One coat of HB epoxy = £70.00 per 20 m² (≈ £3.50/m²)
PermaCOAT — Durable Solutions. Made Possible.
Each product in our PermaCOAT epoxy flooring range is a long-lasting, professional-grade solution for most commercial settings. Designed to cut project times and costs without compromising on quality, you can transform a space and create a flawless finish with ease.
If you have any questions regarding epoxy flooring, then please contact us on 0117 982 3282 for free technical advice. You can also learn more about PermaCOAT here.