
How to Damp Proof Concrete Floors
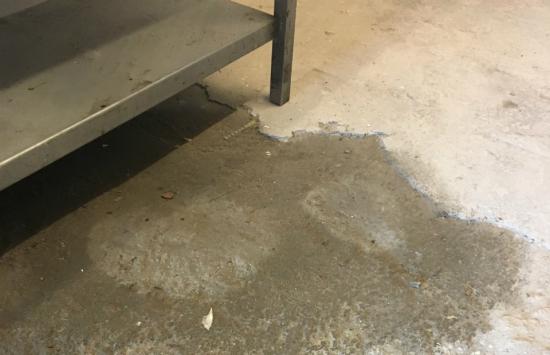
Damp rising through concrete floor slabs is common when a damp proof membrane has failed or was not installed before the floor was laid. It becomes a problem when the moisture levels are too high, and water is transferred to the finishing layer above. This is when you experience damp issues in carpets and floor coverings, the warping of wooden floors.
In this guide, we look at how to damp proof concrete floors above and below ground. We take you through the damp proofing methods available and how to install them.
Damp in Concrete Floors
Damp from the ground can make its way into your concrete floor. Due to concrete’s porous nature, it can then travel through it, causing issues in the flooring above.
Changes in the surrounding environment can have a major impact on moisture levels within the concrete slab. For example, if you remove a large tree or shrub from your garden, it no longer uses water from the ground. This means that ground moisture levels will rise, putting pressure on your home’s damp proofing system, particularly the concrete slabs. It is suggested that you consult a contractor before any large garden landscaping projects.
When faced with damp in concrete floors, there are two options available:
- Dig up the old concrete floor, install a new damp proof membrane and lap up edges before replacing the concrete slab
- Fully isolate the dampness in the floor using a surface Damp Proof Membrane (DPM)
Damp proofing concrete floors above ground
Damp proofing for extensions
When constructing an extension or a new build home, it is important that damp proofing measures are taken during the initial construction phase itself.
These days, damp proof membranes are required in the construction of all new buildings to prevent rising damp. These strong and highly durable Polyethylene 1200 Gauge DPMs are sandwiched between the hard core and concrete slab to form an impermeable layer. For example, just like the diagram below.
Laying a DPM above ground
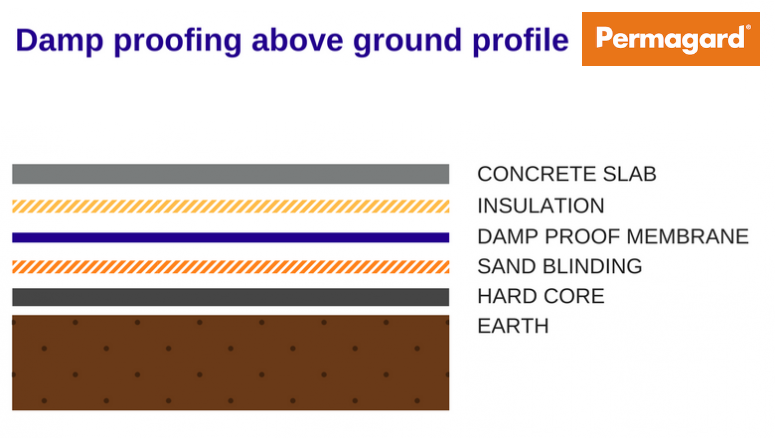
** Always refer to the damp proof membrane manufacturer’s guidance and specification.
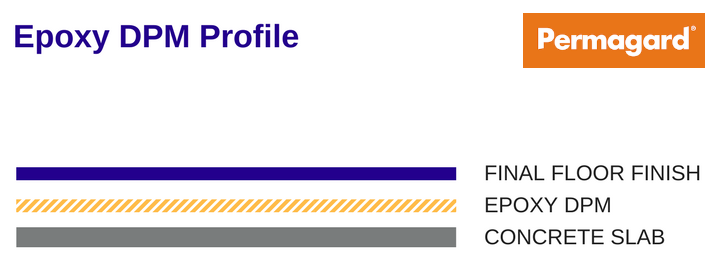
Liquid epoxy DPM for existing concrete floors
A Liquid Epoxy Damp Proof Membrane (DPM) is often used as a remedial solution where an existing DPM has failed or was never installed. The epoxy DPM comes as a two-component system. It is low odour, solvent free, and most importantly deals with constant low levels of moisture in concrete floors.
There are several benefits to using a liquid epoxy DPM:
- An epoxy DPM bonds to the prepared concrete surface and adds very little floor height. A properly installed sheet DPM provides a moisture barrier within a separate floor build-up. In either case, joints and perimeter details must be installed correctly to protect the finishes above.
- In the case of existing concrete floors in factories, commercial spaces and offices, epoxy floor coatings can also be used for its visual impact with its high shine finish and range of colours as well as acting as a DPM for those wanting to achieve a decorative finish.
- Epoxy membranes can be applied directly to damp floors meaning you don’t have to remove the old concrete screed which is an extremely expensive, dirty and time-consuming process. You also don’t have to wait for the floor to dry before installing the damp proof layer, saving you time.
Waterproof epoxy floor paint
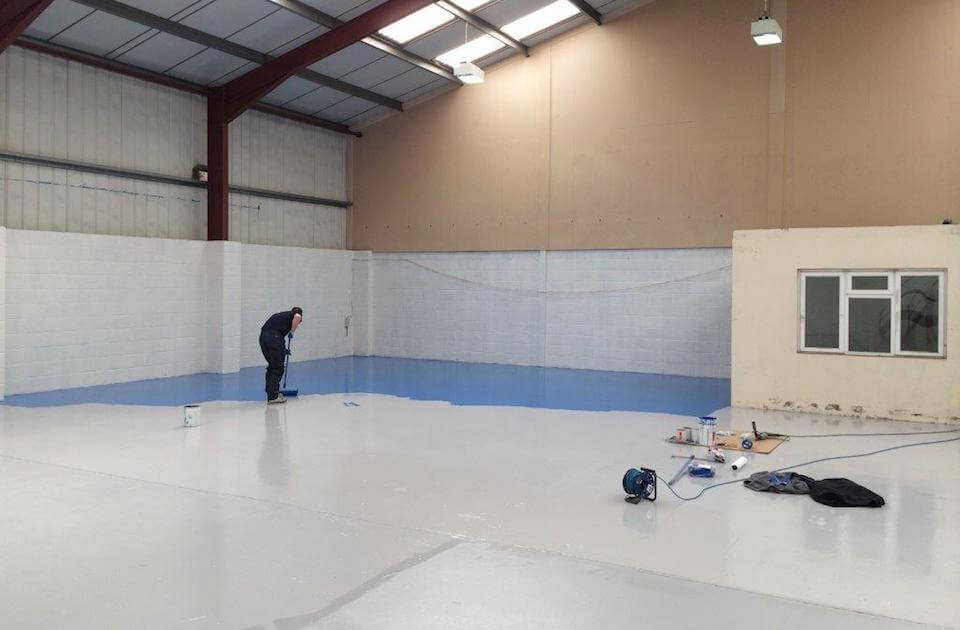
How to apply an epoxy DPM
Before applying an epoxy DPM, remove any old coatings, dirt and loose material from the concrete. Abrade or grind the surface as directed, then vacuum away the dust and make sure the floor is sound and free of standing water. Apply the mixed epoxy with a suitable roller or brush, following the chosen product’s instructions for the number of coats and time between them.
Where the product is laid onto a concrete surface where there is no damp proof membrane or where damage may have rendered the damp proof membrane ineffective, you should give due consideration to the possible presence of hydrostatic pressure and the consequences of creating a barrier layer resulting in the pressure/water flow being directed elsewhere.
Installing a DPM floor membrane above concrete slabs
Some slimline floor membranes, including PermaSEAL 1, can be installed over an existing concrete slab or newly laid concrete as soon as it is walkable, where the floor has been assessed as suitable. Seal the joints and form the specified perimeter upturns in line with the manufacturer’s instructions. A suitable screed or boarded floor build-up protects the membrane and supports the final floor finish; insulation can be included where specified. A 1200-gauge sheet DPM is another option where the floor design calls for it.
Slimline DPM profile
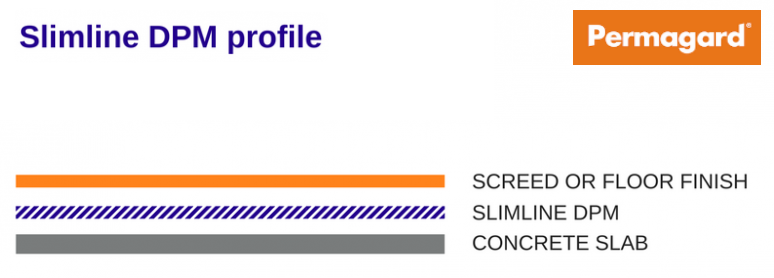
Advantages of installing a slimline DPM:
- Quick and easy to install
- By creating an air gap, floor membranes allow for finishes to be applied whilst the damp floor is still drying out, significantly reducing project times.
- Enhances acoustic and thermal performance
Installing a damp proof underlay for concrete floors
Starting at one side of the room, unroll the membrane and cut to fit the room as one would a carpet. The next membrane width is rolled out so that the edges of the membrane overlaps. These joints are then sealed with waterproof tape. Once the two widths are in alignment, go ahead and remove the backing paper and press down on the joint, sealing the two sections together. This process is repeated until all areas are covered.
Where the floor membrane is required to be joined to wall DPMs, seal with over tape.
What does a slimline floor membrane cost?
PermaSEAL 1 Floor Membrane and Newton 601 Floor Membranes are a cost-effective way to protect your flooring from damp. Prices typically range from £197-£215 (ex. VAT) for 40m².
Tanking garages and sheds
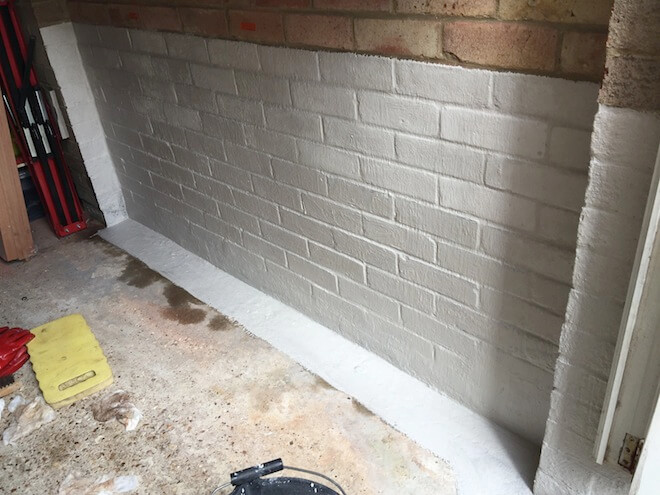
If moisture is entering the garage only through the floor slab, prepare the concrete as described above. Apply a suitable epoxy DPM in the number of coats required by the product and the measured substrate moisture. PermaCOAT Liquid Epoxy DPM requires at least two coats, while PermaCOAT PRO One Coat requires one coat up to and including 98% RH at the specified thickness, or two coats above 98% RH.
It is important to provide a protective layer to the Epoxy Damp Proof Membrane. We suggest this is done by applying one or two coats of our Epoxy Floor Coating HB. The HB coating offers a long lasting, high-gloss grey finish which protects the damp proof membrane and gives an aesthetically pleasing finish to the floor.
If the moisture is entering the garage through the walls, you may wish to use the above system in combination with a tanking slurry on the wall. Tanking slurry is a specially formulated mixture designed to stop water ingress and ensure that your belongings are protected against damp. To find out more about this method of damp proofing, read our Guide to Tanking a Garage.
Damp proofing concrete floor FAQs
Do I need a DPM under laminate flooring?
A floor finish needs effective protection from ground moisture, but this does not automatically mean installing a new DPM directly beneath every laminate floor. Check whether the existing floor construction has an effective DPM, assess the slab’s moisture condition and follow the flooring manufacturer’s instructions.
What’s the difference between a DPC and DPM?
A Damp Proof Course (DPC) is a horizontal barrier that is inserted into the wall to stop any moisture from rising up through the structure by something known as capillary action.
A Damp Proof Membrane (DPM) is a moisture barrier that protects the floor construction and finishes from ground moisture. It may be a sheet membrane within the floor build-up or a suitable liquid-applied system on a prepared substrate.
Does a DPM go above or below floor insulation?
The position of a DPM relative to floor insulation depends on the floor design and materials used. It may sit below the insulation, above it or, in some constructions, on both sides. Follow the project specification and relevant manufacturers’ guidance so the insulation and finishes have suitable moisture protection.
Damp proofing concrete basement floors
It’s an unfortunate fact that basements are prone to damp, water under pressure and flooding.
Due to these factors, we move more into the realm of waterproofing. When we talk about waterproofing, we need the products to have a higher performance level as they must resist water under pressure, and not just damp. They also need to work in combination with all the waterproofing elements in the basement so require a professional, well thought out waterproofing design or plan.
Damp proof membrane under concrete slab
As most basements and cellars are fully below ground, they are prone to water ingress. In these situations, it is better to use a cavity drainage system to manage any water ingress, rather than a DPM.
Cavity drainage systems use profiled floor and wall membranes, drainage channels, and a sump and pump or suitable gravity outlet. Water that enters through the structure is collected behind or beneath the membranes and directed to a safe discharge point, protecting the internal finishes.
These floor membranes, like the PermaSEAL Floor Cavity Drainage Membrane, have larger stud profiles in order to cope with large volumes of water ingress. The PermaSEAL Floor Membrane has a 20mm stud profile giving a high drainage flow rate of 36,000 litres per hour for each square metre of membrane.
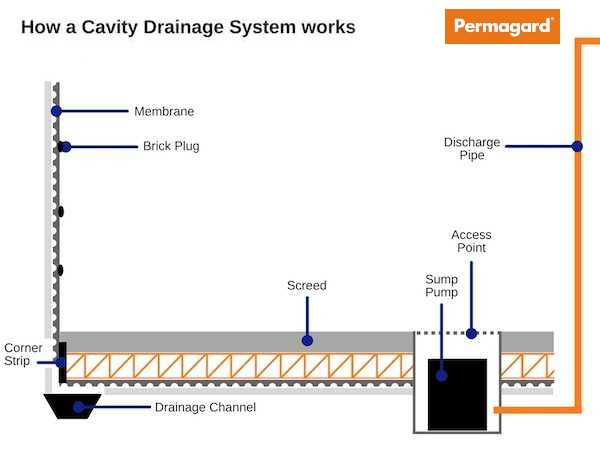
For more information on how a cavity drainage system works, check out our comprehensive guide.
How to install a basement cavity drainage system
Hiring a professional basement waterproofing contractor with experience and qualifications in basement conversions is crucial. The correct products, specification and expert installation are essential for a cavity drain system to work effectively and to last a lifetime.
Basement cavity drainage costs
Installing a cavity drainage system isn’t cheap, but it is highly effective at protecting your home. The overall cost will depend on the size of your basement or cellar. There are two costs that you will always need to account for: the right products and the right waterproofing contractor.
Looking for more information? Here’s our guide to how much basement conversions cost.
How Permagard can help
With more than 35 years of experience in the damp proofing industry, we have the expert knowledge that you need. We can offer impartial advice on the damp proofing products available. If you have any questions or need more information, contact our technical team on [email protected] or call 0117 982 3282.