

The Ultimate Exterior Building Maintenance Guide
The outside of your property is exposed to the elements and is where you’re most likely to see the tell-tale signs of structural issues. This is why exterior property maintenance is so important, as it prevents more serious long-term issues from developing.
At Permagard, we have the products to prevent issues, as well as quick and easy solutions to fix problems you may have. Keep reading to find out how to protect the exterior of your home.
In this guide:
- Why is house exterior maintenance important?
- Fixing exterior wall cracks
- How to fix a bulging exterior wall
- Protecting chimneys from water damage
- Exterior wall waterproofing
- Fixing blocked gutters, cracks or voids in masonry or render
Why is house exterior maintenance important?
The function of the exterior of your home is to prevent the elements from reaching your living spaces inside. If you don’t maintain your house’s exterior, it can be unable to fulfil this function. But it’s not as simple as this – exterior maintenance also:
Saves you money in the long run: Catching issues before they develop into real problems has the potential to save you huge amounts of money. It can be the difference between installing a lateral restraint and significant structural work.
Reduces energy bills: If you let damp penetrate into your walls, it can result in increased heat loss – making your rooms colder and your energy bills higher. Damp, cold walls are also more likely to develop mould. Waterproofing products like PermaSEAL Facade Cream help reduce the heat lost through your walls, improving thermal performance and further reducing bills.
Maximises property value: First impressions are important. If you’re looking to sell, maintaining kerb appeal is important. A survey by YouGov found that 68% of homebuyers consider kerb appeal to be important. If the exterior of your property doesn’t look as though it has been maintained, it’s going to affect the number of people who will be interested, as well as the value of your house.
Property maintenance tips
We understand it can be difficult to keep on top of everything. That’s why we’ve come up with some simple property maintenance tips that will help you stay up to speed with your building’s exterior.
- Keep looking: Regularly walking around your property and taking a look at the walls, windows and roof will help you spot issues as they arise. It also gives you an idea of what ‘normal’ looks like, so you can better identify anything out of the ordinary including damage or wear and tear.
- Keep it clean: Remove debris, including plant matter, from the outside of your house, clean your gutters and keep windows and doors in good shape to help avoid issues.
- Get it fixed: Although it can be tempting to ignore or downplay any issues, getting them fixed ASAP will prevent further headaches and the possibility of problems getting worse. Acting quickly will also save you money in the long run.
Follow these tips and you’ll be best placed to identify and fix any issues that might occur.
Exterior building maintenance can cover many different things, and there will most likely be some exterior maintenance tasks that may never apply to your home. We take a look at the most common and important exterior home repair jobs.
Fixing exterior wall cracks
Cracks appearing on your external walls can be a cause for concern, but usually not one that you should be losing sleep over. We’d always recommend getting a structural specialist to take a look and diagnose the root cause. But if there’s no underlying structural issue that needs to be fixed, Permagard’s Easi-Fix Structural Repair range provides professional solutions to quickly sort cracks in your external walls in a simple, cost-effective manner.
There are a number of causes of cracks in external walls. These include:
- Expansion/contraction of building materials
- Foundations of the house moving over time
- Degradation of construction materials
- Structural failure, such as poor construction of the building
- Environmental reasons, such as temperature changes and thermal expansion
- Brick spalling – when water gets inside the brickwork, freezes, expands and cracks the brick. More water then finds its way into these cracks and the process repeats, widening the gap each time.
There are two types of cracks you’ll commonly see in external brick walls – vertical and horizontal cracks.
If you see horizontal cracks, it’s likely the result of corroded wall ties, which we’ll go into more detail about later in this guide. No matter the type of crack you have, you should fix it sooner rather than later, to prevent more serious structural repair issues in the future.
External wall crack repair
The first step in dealing with cracks in external walls is identifying and solving the root problem. If you can’t identify the cause or type of crack, we’d recommend seeking professional guidance.
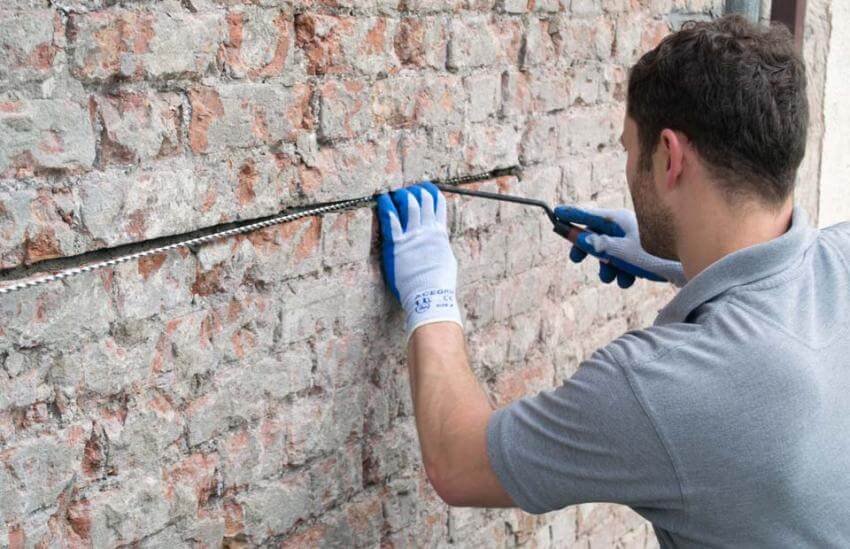
Crack stitching offers the best permanent solution to repairing vertical or stepped cracks in walls and improving structural integrity. This non-destructive process involves using helical bars, which increase tensile and flexural strength to restore structural integrity. These bars are planted into horizontal slots in the mortar bed joints.
We offer two types of crack stitching kits:
Crack Stitching Kit
Heavy Crack Stitching Kit, for larger cracks
Read our guide to repairing cracks in walls to identify and categorise the source, learn more about the crack stitching process and how to make repairs.
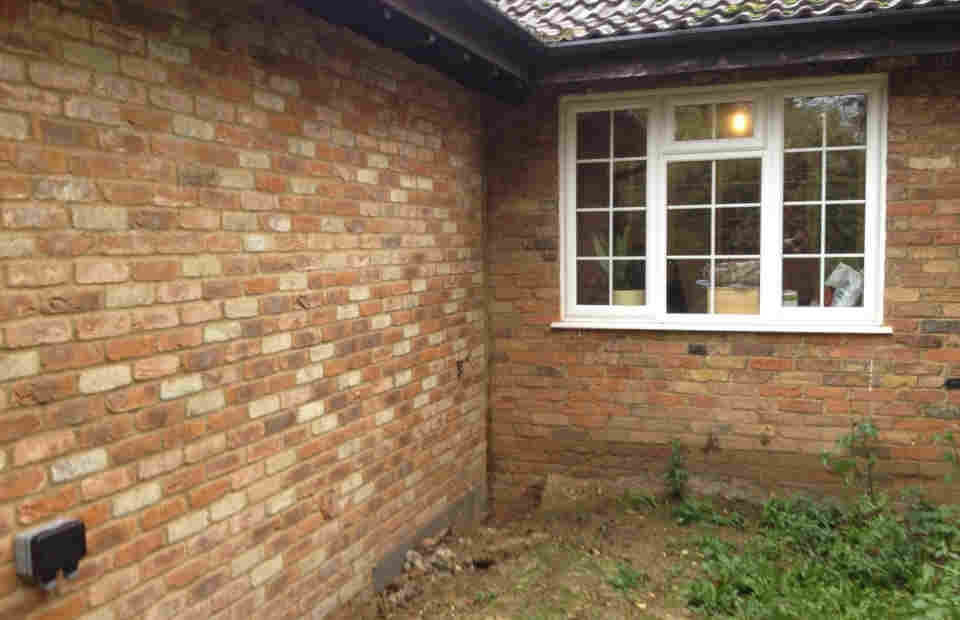
Cracks around windows and doors
Most cracks around windows and doorframes will be nothing to worry about. They can be caused by the house settling or changes in temperature and humidity. But cracks to masonry around window reveals and doorframes, particularly horizontal cracks, can indicate corroded wall ties and diagonal and vertical cracks can point towards lintel failure.
Replacing a lintel
Lintels are structural supports that are installed above most doors and windows. Constructed from metal, timber, concrete or bricks, they support the weight above them to prevent the structure they’re installed above from collapsing. Failing lintels cause vertical, stepped cracks around windows and doors. As lintels fail over time, they generally bow downwards, forcing the brickwork up and inwards.
So, how do you replace a brick lintel? The best way to repair lintel failure is by installing longer helical bars, a relatively simple exterior home maintenance task. You can read our guide on lintel repair for visual guidance, further installation details and more.
Sorting corroded wall ties
If you see horizontal cracks in mortar or around windows, or even bowing brickwork, deteriorating or non-existent wall ties are probably the culprit. These ties are installed in cavity walls to tie together internal and external leaves.
Wall ties can fail due to:
- Construction defects
- Poor installation
- Corroded steel of the tie itself, resulting in rust increasing the tie’s original thickness
Issues with wall tie failure need to be addressed immediately as, if ignored, this can result in further structural damage. We recommend you get a structural surveyor to confirm the issue. They will identify the position of the wall ties using a metal detector or by making large incisions, and recommend the next steps.
Permagard offers a simple and highly effective solution, allowing you to replace wall ties in no time. We stock a wide range of remedial wall ties, including the rapid repair neoprene ties.
For more information click to read our guide to replacing wall ties.
How to fix a bulging exterior wall
Excess moisture, extra weight in the structure and imperfections in the building can sometimes result in bowing or bulging walls. This can also happen when there’s a lack of restraint between the floor joists and the external walls.
Lateral restraints offer a non-intrusive solution that restrains the whole brick outer structure to internal floor joints. Alternatives, like screwing angle straps onto floor joists, are much more intrusive. With lateral restraints, you can insert them from the property exterior while still creating the support needed.
Permagard offers both individual lateral restraints as well as all-in-one kits, so you can conveniently purchase all the tools you need to get the job done.
See our 'How to fix a bulging wall' guide for more information.
Installing lateral restraints
Our Easi-Fix Lateral Restraints can be fitted from outside the property with minimal disturbance. In most situations it’s a case of lifting the floorboards to locate the position of the joists. This allows you to calculate where you need to drill. Our Easi-Fix restraint is suitable for both joists bearing into the wall and joists parallel to the wall.
You can then follow these simple lateral restraint installation instructions:
- Drill a 14mm hole through both brick outer and inner leaves.
- Push the long restraint into the pilot hole and attach the lateral restraint fixing key.
- Slowly wind the restraint through the joists leaving the outer end recessed by approximately 15mm.
- The outer end can now be tested for strength of fix (typically 5Kn - 10Kn)
- You can then resin bond the outer end of the restraint into the brickwork and finish off with either mortar or mastic.
We also stock lateral restraint wall tie kits with all you need.
Rising damp due to a bridged DPC
Usually noticed on the internal face of external walls, rising damp is a relatively rare form of damp that occurs when groundwater is sucked up into the brickwork, travelling up walls through capillary action. If you’re noticing tide marks, crumbling mortar or salt deposits on your external walls, then chances are you have rising damp.
In most buildings, there is a waterproof barrier installed towards the bottom of the wall known as a damp proof course (DPC). Rising damp occurs due to a failed damp proof course, or when a DPC is absent. It can also occur when external ground levels are so high that they bridge an existing DPC – usually when soil is placed higher than the damp proof barrier during gardening work – or debris enters the cavity wall.
It’s important to keep an eye on external ground levels and any build-up that could cause water to bridge the DPC.
If left untreated, rising damp can cause serious structural damage to a building while creating an unpleasant living environment. It can ruin walls, floors and decorative finishes and leave a musty smell throughout the house. Black mould may start to appear, leading to airborne spores which are bad for your health. And finally, rising damp results in heat loss due to wet walls – and an increase in energy bills.
Rising damp on exterior walls
Before dealing with rising damp, it’s worth noting that this particular type of damp can only be sorted if diagnosed properly. You should seek professional advice from a qualified surveyor before attempting to fix the issue.
If the cause of rising damp is down to external ground bridging the DPC, then the first step is to reduce the height of the soil/ground, to prevent the issue from happening again.
Damp proofing injection cream is the easiest, most cost-effective way to treat rising damp. Once injected into drilled holes, the cream reverts to liquid form and penetrates the bricks themselves. This creates a new chemical damp proof course that prevents water from rising up the wall.
PermaSEAL PRO DPC Injection Cream, also available as a 10 cartridge PermaSEAL PRO DPC Injection Kit, provides permanent protection against rising damp. This high-strength cream is specially formulated so you can efficiently create a new DPC in walls of various types, including substrates saturated with water. Find out more about our PermaSEAL PRO DPC Cream here.
To read more about rising damp, its causes and what to do after DPC cream installation, click to read our rising damp guide.
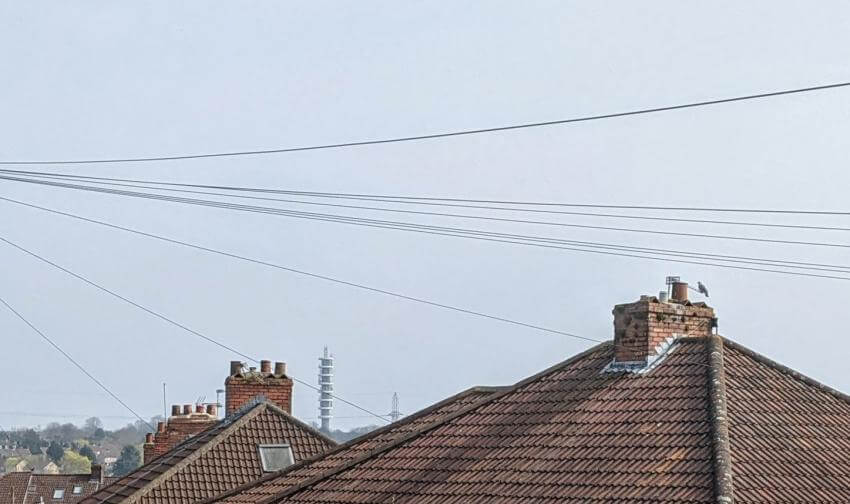
Protecting chimneys from water damage
Chimneys are particularly vulnerable to water damage and structural issues as a result of constant exposure to the elements. This includes extremely wet weather, wind and cold snaps. Fixing chimney problems can be a hard and time-consuming job, so it’s important to protect your chimney from potential water and structural damage as soon as possible.
Many issues are harder to spot on chimneys and are usually not noticed until they’ve become serious problems. Here are some of the signs you should look out for:
- Cracking in brickwork
- Efflorescence (a milky residue on the chimney surface)
- Algae and moss
- Musty smells throughout the property
These symptoms can be the result of:
- Water ingress making its way down the chimney, resulting in various problems including structural issues, wet and dry rot, and mould.
- Freeze-thaw, which is when water is absorbed into the chimney brickwork then freezes and thaws. This creates cracks and weakens the condition of the bricks.
Waterproofing a chimney with MicroShield Ultra
Most chimney issues can be resolved using masonry waterproofing cream if the mortar is in good condition and has no cracks or voids for ingress to track through. MicroShield Ultra Masonry Waterproofing Cream creates an impenetrable barrier by lining the masonry pores with silicone. This protects against water damage, whilst allowing water vapour to escape without affecting the appearance of the brickwork.
Read our chimney waterproofing guide to see how you can use MicroShield Ultra to protect a chimney from future water damage and structural issues.
Waterproofing external walls
We experience some pretty wet and windy conditions here in the UK, so it’s essential that masonry is protected from water damage and penetrating damp.
Penetrating damp occurs when water enters a building from the outside. If you don’t have adequate protection, it can lead to:
- Damp and mould on internal walls
- Increased heat loss and higher energy bills
- Wall tie corrosion
- Damaged brickwork – in particular, something known as spalling
If you’re seeing damp patches on internal walls, and algae growth or damaged brickwork on the outside, it’s a good contender for penetrating damp.
You can protect against penetrating damp using facade cream, which leaves a strong breathable barrier on external masonry. When it comes to waterproofing exterior walls products, PermaSEAL Facade Cream is the high-strength, breathable solution you need.
Our facade cream provides protection against driving rain, damp and frost damage, and has a high amount of active ingredients (silane and siloxanes). This concentrated formula penetrates exterior walls to create a breathable water-repellent barrier. Its cream consistency doesn’t run down the wall as it’s absorbed into the brickwork, meaning that you’ll experience full waterproof protection.
Before starting your exterior wall waterproofing, first make sure to deal with any cracks in the masonry and clear away debris and loose mortar – repointing the mortar with our waterproofer render additive is best practice. Our PermaSEAL Facade Cream is easy to apply. Simply apply straight from the bucket using a roller brush or spray equipment – only one coat needed!
You can read more about external damp proofing in our guide.
Fixing blocked gutters, cracks or voids in masonry or render
Penetrating damp also occurs due to any number of building faults such as blocked gutters, loose mortar or faulty downpipes. Gutters that are blocked, overflowing or too small can lead to a regular source of water that may eventually find its way into the building. It’s best to check for and resolve any gutter problems as soon as possible to prevent this from happening.
Meanwhile, external mortar can become friable and loose over time, causing voids and cracks. This creates an entry point for water ingress, especially with constant battering from the elements. If you’ve noticed this on your property, it’s best to repoint the mortar and fix the issue ASAP, followed by application of PermaSEAL Facade Cream to protect exterior walls from future issues.
Exterior wall maintenance with Permagard
At Permagard, we’re the exterior wall experts. From penetrating damp to structural repair issues, we provide expert solutions at trade prices to protect your property. For information on external building maintenance, get in touch to speak to our specialist team.
Show updates
- 24/11/2025 — Update to guidance and products.


