
How Do I Protect My Outside Wall from Damp?
Damp on external walls is a common problem that can stem from a number of issues. If not treated properly, it can lead to even more problems down the line. That’s why you should be proactive and install the right protective measures to save money and keep your home warm and dry.
In this guide, we’ll cover how to protect your outside walls from damp with a bit of DIY and the right tools. We’ll also take you through dealing with an existing damp wall by fixing the root cause of the damp before making good and installing the right damp protection.
Protect against damp with exterior wall waterproofing
Most methods for protecting against damp externally are relatively simple DIY tasks, such as applying facade cream or installing a new damp proof course. If you’re already suffering from a damp exterior wall, it’s important to fix whatever it is that’s causing the damp. This could mean fixing leaky gutters or pipes, replacing old, crumbly mortar or even carrying out crack stitching repairs. How you implement external wall damp proofing will depend on the type of damp you have.
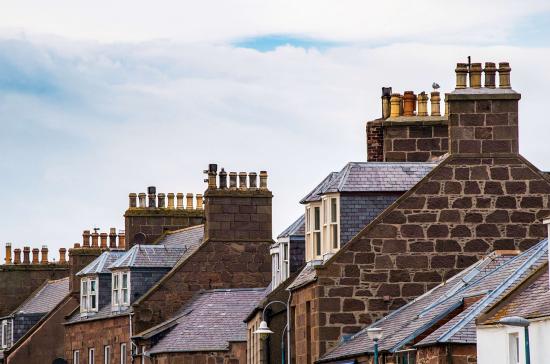
Regular inspections of the exterior of your property are vital to protecting your home from damp and structural issues, especially on external walls. It’s best to have an idea about the different types of damp and what they look like, so you can spot the warning signs and identify the issue quickly. Our external property maintenance guide summarises some of the common damp and structural repair issues, including what to look for and how to fix them.
One of the main ways of protecting against damp is preventing water ingress through walls, which can happen through old, failing mortar or simply heavy rain being absorbed by brickwork and masonry. We’ll look at how you can sort these issues below.
Related Articles
The ultimate guide on how to protect the exterior of your home.
Repairing and replacing mortar
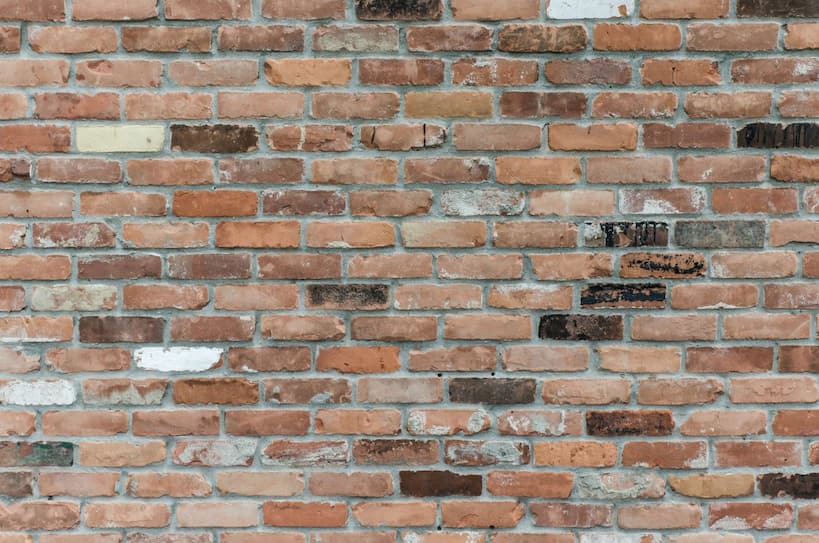
Poor, crumbling or non-existent mortar can accelerate damp on an external wall as it allows water to seep through to the inside of your home. It’s best to repair or replace old mortar if you’re prone to damp problems.
- First, remove old mortar to at least 10mm depth
- Use a mortar mix that’s appropriate for the age of the property and isn’t too strong for the surrounding brickwork. Apply using a trowel.
- If the mortar is in too poor condition across the entire wall, then we’d recommend raking out and replacing all its front section, rather than just doing a patch repair.
Once cured, the wall is ready to receive water repellents for damp proofing your exterior walls.
Protect from damp on external walls with water repellents / facade creams
Now that your exterior walls are free of defects, you can install external damp protection. Water repellents protect masonry from penetrating damp, freeze thaw and structural damage, and can be applied quickly and easily. They’re a cost-effective way of preventing more costly issues later down the line.
We stock market-leading water repellents, including:
With these exterior wall waterproofing creams, water beads off the wall instead of soaking into the brickwork. Their cream consistency provides better absorbency of the active ingredients, ensuring long-lasting damp protection. This also means that none of the product goes to waste as it avoids runoff.
You only need one coat for long-lasting protection - PermaSEAL Facade Cream lasts for 20+ years, whereas MicroShield Ultra lasts for 20-30. For more info on water repellents, read our guides on:
An alternative to facade creams on brickwork is to use a breathable brick sealer like PermaSEAL Brick Sealer. Read our mythbusting brick sealer guide for more information.
I have damp on my outside walls - how do I fix this?
Dampness on outside walls is a common problem - but the good news is that there are various non-invasive ways to sort it. Permagard have the tools and guidance needed to help you get the job done. Keep reading to identify your damp problem and see what you need to fix it.
The importance of solving damp external wall problems
Masonry and brickwork are porous and absorbs water from heavy or driving rain as well as any other water source. This makes it easier for water to travel through brickwork, penetrating deep into your building substrate and causing a variety of damp and structural problems.
Leaving damp issues unsolved can then lead to:
- Damp and mould on internal walls
- Freeze thaw damage to brickwork
- Structural issues & damaged timber
- Damaged brickwork, which can be costly to fix
- Heat loss and therefore higher energy bills
The longer you leave your external damp issue, the more problems you’ll have to deal with down the line. Ideally, you should install protective measures so you never actually see signs of damp in your home. It’s never too late however, and once you’ve fixed your current damp issue there are proactive steps you can take to prevent it from happening again.
See our guide for more information about the difference between damp proofing and waterproofing.
Why are my external walls damp?
There are several reasons why you could be seeing damp on an external wall:
- Heavy/driving rain that’s been absorbed into your brickwork
- Cracks in walls/building faults, as crumbly mortar or missing render
- Plumbing issues creating a constant source of water
- Leaky or overflowing gutters or downpipes causing water to stream down masonry
- High soil levels, which can lead to a bridged DPC
- You may not have a DPC or have an old one that’s no longer working.
You must diagnose the cause of damp patches on external walls in order to fix it correctly. It always makes sense to consult a professional for a correct diagnosis.
What does damp on outside walls look like?
The first step in treating damp on external walls is to identify the type and put the right fixes in place. We’ve gone into detail about identification and the causes of damp in our guide, but here’s a few signs to look out for.
The signs of damp on external walls can include:
- Damp patches on exterior walls
- Damaged brickwork
- Algae and moss growth
- Salts on external walls
- Crumbly or old mortar
You may spot damp on internal walls first. If you see:
- Damp patches, tide marks or peeling paint on your walls
- Salts on walls
- Condensation on windows
- Musty smell
Then you’re likely experiencing damp issues. Each symptom points to a different type of damp, such as penetrating or rising damp. Read more about dampness on walls here.
Penetrating damp on external walls
Penetrating damp is caused by water entering your home through a building fault, such as cracks in your walls, leaky pipework or plumbing issues. It can also be caused by heavy rain. Water seeps through the building, leading to internal mould growth. It can also result in freeze-thaw in your brickwork over winter. This is when water gets into the brickwork, freezes and expands. This causes the pores and cracks to allow more water in and the cycle to continue causing more structural damage that can be a costly issue to fix.
Penetrating damp can also impact the thermal performance of your property as damp walls encourage heat loss, increasing your energy bills in turn. The longer penetrating damp is left, the weaker your overall building facade becomes, so it’s important to take the proactive steps needed to ensure you don’t have to deal with penetrating damp.
Rising damp on external walls
Rising damp is a rare form of damp that is often first noticed on internal walls. It occurs when water rises through the brickwork in capillary action. It is the result of a failed or non-existent damp proof course (DPC), or when the DPC has been bridged, possibly because of building works in your garden. Without a DPC, there’s nothing to prevent water from travelling up your walls.
Before fixing rising damp, it’s important to confirm your diagnosis with a professional - as it’s a rare form of damp it can often be misdiagnosed. Read more about rising damp in our guide.
Solving the root cause of external wall damp and repairing cracks in walls
Before you can start installing protective measures, you first need to fix the source of the damp - need to ensure you’re treating it correctly. So, say your cause of your damp external wall is leaky or blocked guttering, you need to get it sorted ASAP.
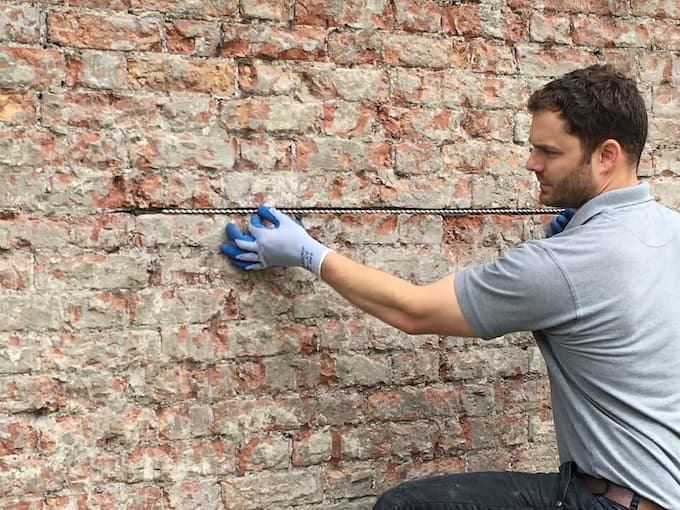
This also applies to any cracks in your walls. A wall crack is the perfect opportunity for more water to penetrate your home, leading to penetrating damp and freeze thaw damage. Most cracks can be repaired using helical bars, a cost-effective way of restoring structural stability for years to come.
At Permagard, we offer helical bars in a variety of lengths, quantities and thicknesses. They can be purchased on their own or as part of our popular crack stitching kits - the Easi-Fix Crack Stitching Kit and the Easi-Fix Heavy Duty Kit, designed for larger cracks.
Crack stitching can be done without a professional, but you will need to read the instructions carefully to ensure that the bars are correctly installed. We’d still recommend having a professional confirm the type of crack and assess structural stability before you decide on treatment. Our guide to fixing wall cracks goes into more detail about the different types, causes and how you can use our helical bars to restore your external wall.
If you’re seeing cracks around windows and doors, this could be due to lintel failure. Lintels are installed around doors and windows for extra support around these openings; however, over time they could corrode or become cracked as your property shifts. Helical bars can also be used for lintel repair - read our guide on replacing lintels to see how.
Can I inject a damp proof course from outside?
If the damp patches on external walls are due to rising damp, then you may need to install a new damp proof course (DPC). A chemical damp proof course can be installed from outside; however, you will need to re-render once the new DPC is installed. This ideally shouldn’t be applied over the DPC unless the render you’re using is waterproof.
As we mentioned earlier, first confirm your rising damp diagnosis with a professional before starting treatment.
Damp proofing injection cream is a cost-effective and fast way to treat rising damp on external walls. It’s designed to penetrate the mortar, which then absorbs the product and lines the capillaries, forming a new water repellent barrier that provides you with peace of mind. For step-by-step instructions on applying damp proof cream, click to read our guide.
PermaSEAL PRO DPC Injection Cream provides permanent protection against rising damp. This high strength cream is specially formulated so you can efficiently create a new DPC in walls of various types, including substrates saturated with water. Find out more about our PermaSEAL PRO DPC Cream here.
Damp proofing exterior walls
Remember, only once the source of damp is solved can you start damp proofing outside walls and using protective measures. If you are seeing damp patches on external walls, then you’ll need to start by identifying the type of damp to make sure you solve the issue correctly:
- Importance of solving damp external wall problems
- Why are my external walls damp?
- What does damp on outside walls look like?
External damp proofing with Permagard
If you’ve spotted damp on your external walls and are unsure of what steps to take, Permagard can help. Speak to our team for technical support so you can get the job done. Call us on 0117 982 3282 or email at [email protected].
